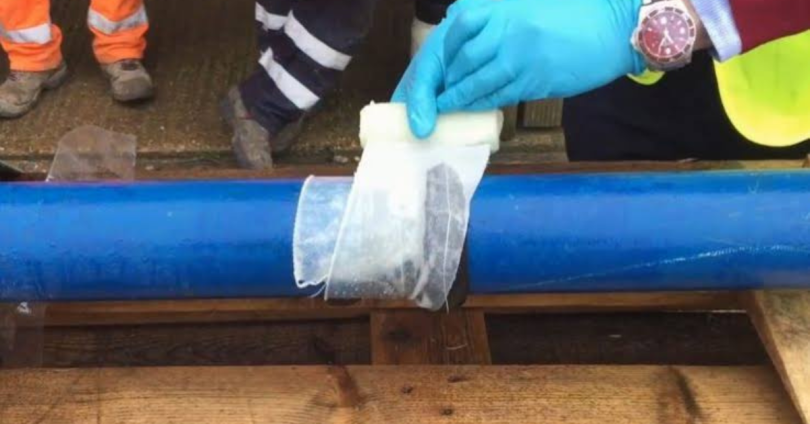

Understanding Different Types of Pipe Leaks
Not all pipe leaks develop in the same way. Some begin as tiny openings that are difficult to notice, while others can cause a large amount of water to escape suddenly. Understanding the different types of leaks can help homeowners recognize warning signs and determine how urgently the problem needs attention.
Pinholes and Small Cracks
Pinhole leaks are very small openings in a pipe that can develop gradually, particularly in aging or corroded metal plumbing. Small cracks can occur when pipes become weakened or damaged.
Although these leaks may initially release only a small amount of water, they can worsen over time and cause moisture damage, mold growth, or higher water usage.
Joint and Connection Leaks
Pipe joints and connections rely on fittings, seals, or threaded connections to prevent water from escaping. Leaks can develop when connections become loose, seals deteriorate, or fittings become damaged or corroded.
These leaks are commonly found beneath sinks, around appliances, near water heaters, and at accessible pipe connections.
Valve Leaks
Valves control or stop water flow through a plumbing system. A valve may leak when its internal seal wears out, its connections deteriorate, or the valve body becomes damaged or corroded.
A leaking shutoff valve can make other plumbing repairs more difficult because the water supply may not stop completely when the valve is closed.
Corrosion-Related Leaks
Corrosion can gradually weaken metal pipes and plumbing components. As the material deteriorates, small openings, cracks, or weak points may develop.
Rust, discoloration, mineral deposits, flaking metal, and recurring dampness can be warning signs of corrosion-related leaks. Severely corroded sections may require replacement rather than a temporary repair.
Burst Pipe Leaks
A burst pipe is a major plumbing emergency in which a pipe splits or breaks and releases a large volume of water. Freezing temperatures, severe corrosion, physical damage, or excessive pressure can contribute to pipe failure.
A burst pipe can quickly cause extensive water damage. If one occurs, shut off the main water supply as soon as it is safe to do so and arrange emergency plumbing assistance.
Hidden Pipe Leaks
Hidden leaks occur in areas that are difficult to see or access, such as behind walls, beneath floors, inside ceilings, or underground.
Warning signs can include unexplained increases in water usage, damp spots, water stains, musty odors, mold growth, low water pressure, or the sound of running water when fixtures are turned off.
Because hidden leaks can continue for a long time without being noticed, early investigation is important to limit water damage and protect the structure of the home.
Tools You May Need for a Pipe Repair
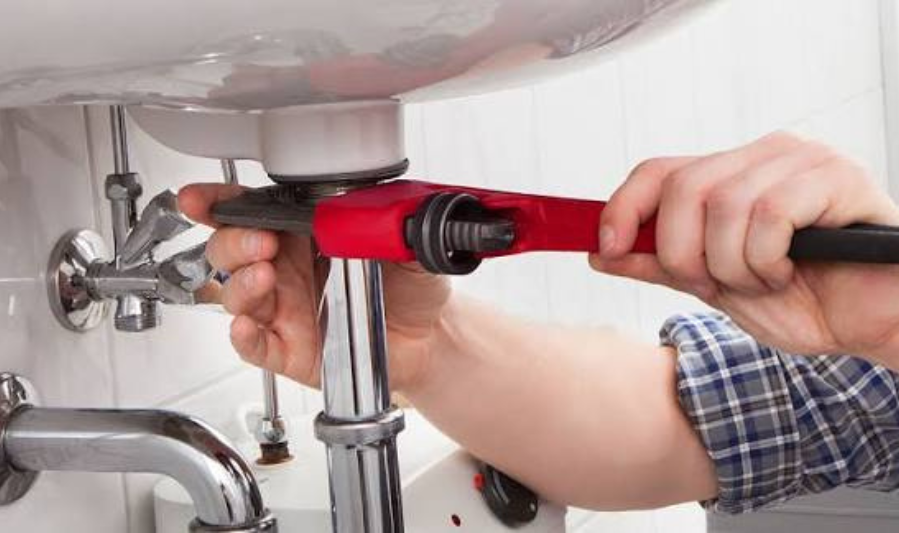
The tools required for a pipe repair depend on the pipe material, leak location, and type of repair. For minor, accessible plumbing work, having a few basic tools and safety supplies on hand can make the job easier.
Adjustable Wrench
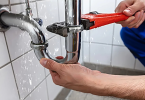
An adjustable wrench can be used to loosen or tighten nuts, fittings, and other accessible plumbing connections. Use controlled force to avoid damaging fittings or threaded components.
Pipe Cutter
A pipe cutter is designed to make clean cuts through certain types of plumbing pipe. The appropriate cutter depends on the pipe material and diameter.
For repairs involving pipes inside walls, ceilings, or other inaccessible areas, professional assistance may be more appropriate than attempting to cut into the plumbing yourself.
Screwdriver
A screwdriver can be useful for removing drain covers, access panels, clamps, and other components that use screws. Choose the correct screwdriver type and size to avoid damaging the fasteners.
Plumber’s Tape
Plumber’s tape, commonly called thread-seal tape, can be used on compatible threaded pipe connections to help create a watertight seal. It should not be used as a substitute for the correct gasket, washer, or seal where those components are required.
Pipe Repair Clamp
A pipe repair clamp can provide a temporary or, where specifically designed and appropriate, longer-term repair for certain accessible leaks. The correct clamp must match the pipe size and material.
Temporary repair products should not be relied on indefinitely when a pipe is severely corroded or damaged.
Replacement Fittings
Depending on the repair, you may need compatible replacement fittings, connectors, washers, or other components. The replacement part should match the pipe material, size, and connection type.
Bucket and Towels
A bucket can catch water from an accessible leaking pipe or connection, while towels can help absorb spills and protect nearby surfaces during the repair.
Safety Gloves
Protective gloves can help shield your hands from sharp pipe edges, dirt, corrosion, and contaminated water. Additional protective equipment may be appropriate depending on the plumbing conditions.
Before beginning any repair, shut off the appropriate water supply and relieve pressure where necessary. If the leak is inside a wall or ceiling, involves a burst pipe, or requires extensive cutting or pipe replacement, professional plumbing assistance is generally the safer option.
How to Fix a Small Pipe Leak
A small leak from an accessible pipe or connection may sometimes be contained temporarily until a proper repair can be completed. The appropriate method depends on the pipe material, leak location, and severity of the damage. If the pipe is severely corroded, cracked, or difficult to access, professional repair is recommended.
Turn Off the Water
Before working on a leaking pipe, shut off the water supply to the affected fixture or plumbing section. If an individual shutoff valve is unavailable or does not stop the flow, the home’s main water shutoff may be necessary.
Open a nearby faucet briefly to relieve remaining pressure in the line.
Dry and Clean the Affected Area
Use a towel to dry the outside of the pipe around the leak. Remove dirt, moisture, and loose surface corrosion where appropriate so you can clearly see the damaged area.
A dry surface is particularly important when using a temporary repair product because many repair materials require a clean, dry surface to adhere properly.
Identify the Exact Leak Location
Carefully determine where the water is escaping. A leak may come from:
- A small hole or crack in the pipe
- A joint or fitting
- A valve connection
- A damaged section of pipe
Make sure the visible water is actually coming from the suspected location. Water can travel along a pipe before dripping, making the apparent leak location misleading.
Apply an Appropriate Temporary Repair
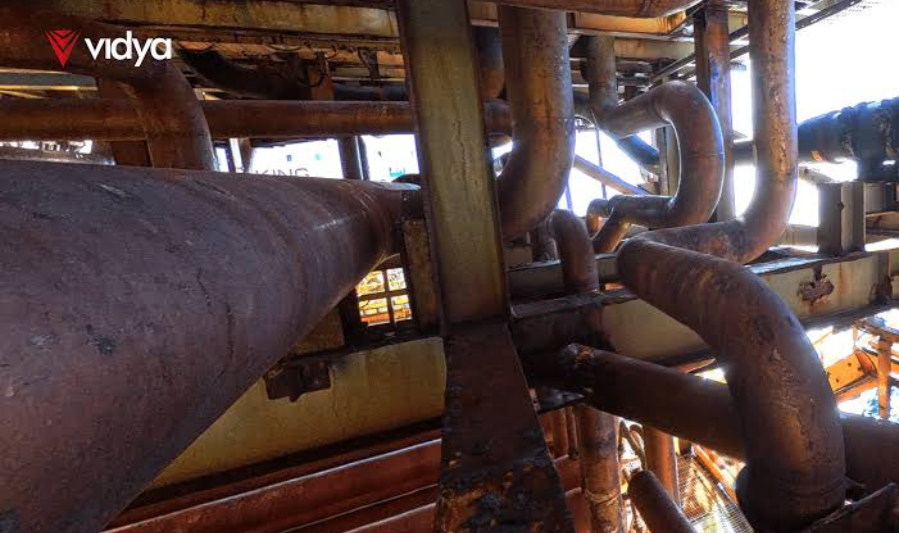
For a small, accessible leak, an appropriate pipe repair clamp or manufacturer-approved repair material may help temporarily control the leak.
Choose a product designed specifically for the pipe material and type of damage, and follow its installation instructions carefully. Temporary repairs should not be treated as a permanent solution for severely corroded, cracked, or deteriorating pipes.
Restore Water Slowly
Once the repair has been applied according to the product instructions, restore the water supply gradually. Avoid immediately opening the valve fully, as sudden pressure can reveal weaknesses in the repair or surrounding plumbing.
Check for Continued Leaking
Carefully inspect the repaired area for dripping or moisture. Continue monitoring the connection for a period after restoring the water supply.
If the leak continues, returns, or appears to be coming from a damaged section of pipe rather than a simple connection, shut off the water again and arrange a proper repair.
For leaks inside walls or ceilings, burst pipes, extensive corrosion, or significant water loss, professional plumbing assistance is recommended rather than relying on a temporary patch.
How to Fix a Leaking Pipe Joint
A leaking pipe joint may be caused by a loose connection, worn washer, damaged fitting, deteriorated seal, or corrosion. If the joint is accessible and the problem is minor, it may be possible to make a straightforward repair. More serious damage may require professional plumbing work.
Inspect the Joint and Fittings
First, turn off the water supply and dry the area around the joint. Inspect the connection carefully for dripping, cracks, corrosion, mineral deposits, or damaged seals.
Check nearby connections as well, since water can travel along a pipe and make another location appear to be the source of the leak.
Check for Loose Connections
Determine whether the joint or fitting has become loose. Some plumbing connections can loosen over time because of vibration, temperature changes, or normal use.
Only attempt to tighten an accessible connection that is designed to be tightened. Do not force a heavily corroded or damaged fitting.
Tighten Carefully Without Overtightening
Use the appropriate wrench to tighten the connection gradually. On connections that require two tools, hold the stationary fitting securely while tightening the other component.
Avoid overtightening. Excessive force can damage threads, crush seals, crack fittings, or create another leak.
Replace Damaged Washers or Fittings When Needed
If tightening does not stop the leak, the washer, gasket, seal, or fitting may be damaged.
Replace the affected component with a compatible part that matches the pipe size, material, and connection type. If the fitting or surrounding pipe is severely corroded, replacing the deteriorated section may be more appropriate than simply installing a new seal.
Test the Connection After Repair
Restore the water supply slowly and carefully inspect the repaired joint. Look for dripping, dampness, or moisture around the connection.
Run the connected fixture, where appropriate, and check the joint again while water is flowing. If the connection continues to leak or the pipe appears damaged or severely corroded, shut off the water and arrange professional repair.
How to Fix a Leaking Pipe Under the Sink
A leak under the sink can come from a supply line, shutoff valve, drain connection, or fitting around the faucet. Because the area is usually accessible, homeowners can often identify the source with a basic visual inspection. However, damaged or heavily corroded components may require professional repair.
Check Supply Lines
Inspect the flexible or rigid supply lines that connect the faucet to the shutoff valves. Look for dripping, dampness, cracks, corrosion, or water collecting along the line.
If a supply line is damaged or deteriorated, it is generally better to replace it rather than attempt to patch it.
Inspect Shutoff Valves
Check the shutoff valves beneath the sink for moisture or dripping around the valve body and connections. A leak may come from the connection between the valve and supply line or from the valve itself.
Do not force a stuck or heavily corroded valve. Attempting to turn it aggressively can damage the valve or cause a larger leak.
Examine Connections Around the Faucet
Look at the connections beneath the faucet, including the mounting area and supply connections. Water can sometimes travel down the faucet body before appearing underneath the sink, so dry the area first and observe where fresh moisture develops.
A loose connection may sometimes be tightened carefully, while damaged seals, fittings, or faucet components may need replacement.
Place a Container Underneath Before Disconnecting Anything
Before loosening a pipe, supply line, or fitting, place a bucket or suitable container underneath it. Even after the water supply is shut off, water may remain inside the plumbing.
Keep towels nearby to absorb spills and protect the cabinet or surrounding surfaces.
Replace Damaged Components When Necessary
If inspection identifies a cracked supply line, worn washer, damaged fitting, or deteriorated seal, replace it with a compatible component designed for the specific plumbing connection.
After the repair, restore the water supply slowly and check the connection carefully for leaks. If the source remains unclear, the leak involves extensive corrosion, or water is entering the cabinet or surrounding structure, professional plumbing assistance may be necessary.
How to Handle a Burst Pipe
A burst pipe can release a large amount of water in a short time and cause significant damage to walls, ceilings, flooring, furniture, and other parts of the home. Acting quickly can help limit the damage while professional repairs are arranged.
Shut Off the Main Water Supply Immediately
Locate the home’s main water shutoff valve and turn it off as soon as it is safe to do so. This stops or significantly reduces the flow of water into the damaged plumbing system.
If the valve is stuck or cannot be operated safely, contact a professional plumber or appropriate emergency service for assistance.
Open Nearby Faucets to Reduce Pressure
Once the main water supply has been shut off, open nearby faucets to help release remaining water and pressure from the plumbing lines.
Allow the water to drain where it can do so safely, while avoiding unnecessary exposure to electrical equipment or contaminated water.
Protect Furniture and Flooring From Water
Move furniture, electronics, valuables, and other belongings away from the affected area if you can do so safely.
Use buckets, towels, or other suitable materials to collect or absorb water from accessible areas. If water has entered walls, ceilings, or flooring, additional drying and water-damage assessment may be necessary.
Avoid Electrical Hazards Around Standing Water
Do not touch electrical outlets, appliances, extension cords, switches, or other electrical equipment that is wet or surrounded by standing water.
If electrical equipment or wiring may have been exposed to water, keep away from the area and have the situation assessed by an appropriately qualified professional. Never enter standing water to reach an electrical switch or panel.
Contact a Professional Plumber for Permanent Repair
A burst pipe generally requires more than a temporary patch. A qualified plumber can identify the cause of the failure, remove the damaged section, and install the appropriate replacement pipe and fittings.
After the plumbing repair, the affected area should be checked for hidden water damage and thoroughly dried to reduce the risk of mold and structural deterioration.
Because a burst pipe can cause extensive damage quickly, prioritize stopping the water flow and keeping people away from electrical or otherwise hazardous areas while professional help is arranged.
Temporary Repair vs. Permanent Repair
When a pipe begins leaking, a temporary repair can sometimes help control the water until a proper repair is available. However, temporary solutions should not be treated as a permanent fix, particularly when the pipe is severely damaged or corroded.
Temporary Repair
Temporary repair methods are intended to contain or reduce a leak for a limited period. Depending on the pipe material and type of damage, options may include:
- Repair tape: Some plumbing repair tapes are designed to wrap around small leaks or damaged sections. They must be compatible with the pipe and used according to the manufacturer’s instructions.
- Clamps: A suitable pipe repair clamp can sometimes temporarily contain a small, accessible leak. The clamp must be correctly sized for the pipe and the type of damage.
- Compatible epoxy products: Certain plumbing epoxy products are designed for specific pipe materials and minor leaks. They should only be used as directed and are generally not appropriate for severely damaged or deteriorated pipes.
Before applying any temporary repair, shut off the water and dry the affected area when possible. A temporary patch should be monitored for continued leakage.
You may also like to read these posts:
Common Plumbing Problems at Home: Causes, Solutions & Prevention Tips
Water Leaking From Pipes: Causes, Warning Signs & How to Fix It
Low Water Pressure Problems: Causes, Solutions & Prevention Tips
Clogged Drain Problems: Common Causes, Easy Fixes & Prevention Tips
Permanent Repair
A permanent repair addresses the damaged component and, where possible, the underlying cause of the leak.
- Replacing damaged pipe sections: Severely cracked, corroded, or weakened sections may need to be removed and replaced with compatible pipe.
- Replacing faulty fittings: Damaged, corroded, or deteriorated joints, valves, and fittings should be replaced rather than repeatedly patched.
- Professional plumbing repairs: Leaks inside walls or ceilings, burst pipes, extensive corrosion, or complicated plumbing systems may require a qualified plumber.
The correct permanent repair depends on the pipe material, location, age, condition, and cause of the leak. If a temporary repair fails or the leak repeatedly returns, arrange a proper inspection rather than continuing to apply patches.
How Much Water Can a Leaking Pipe Waste?
A leaking pipe can waste more water than many homeowners realize. The amount depends on the size of the leak, the water pressure, and how long the leak continues. Even a small leak can add up when water escapes continuously for days or weeks.
Small Leaks Can Waste Water Over Time
A small pinhole or slow leak may release only a limited amount of water at any one moment. However, because the leak can continue around the clock, the total water loss can become substantial over time.
For example, a few drops every minute may seem insignificant, but thousands of drops can accumulate over the course of a day. Larger leaks can waste water much more quickly.
Continuous Dripping Adds Up
Unlike a faucet that is used only occasionally, a leaking pipe may continue releasing water whether anyone is home or not. A steady drip or slow stream can therefore result in ongoing water consumption without providing any useful household benefit.
The actual amount of water wasted depends on the leak rate. A simple way to understand the impact is:
Water wasted = leak rate × time
A leak that continues for weeks or months can therefore waste considerably more water than the same leak repaired within a few hours.
Fixing Leaks Quickly Reduces Unnecessary Water Use
Repairing a leaking pipe promptly stops water from being lost unnecessarily. It can also help prevent the leak from becoming larger, which may reduce the risk of water damage to walls, ceilings, flooring, cabinets, and other parts of the home.
If you notice unexplained water usage, damp areas, dripping pipes, or other signs of a leak, addressing the problem early can help conserve water and prevent more extensive plumbing damage.
How to Detect a Hidden Pipe Leak
Hidden pipe leaks can occur behind walls, beneath floors, inside ceilings, or in other areas that are difficult to access. Because the leaking pipe may not be visible, homeowners often need to rely on indirect warning signs. Detecting a leak early can help reduce water waste and limit damage to the property.
Unexplained Water Bills
A sudden or gradual increase in water usage without a corresponding change in household habits can be a warning sign. If water consumption remains unusually high even when faucets, toilets, and appliances are not being used more than normal, a hidden leak may be worth investigating.
Damp Walls or Ceilings
Unexplained dampness, moisture, or water stains on walls and ceilings can indicate a pipe leaking behind the surface. Persistent moisture should be investigated promptly because it can damage building materials over time.
Peeling Paint
Paint that bubbles, blisters, flakes, or peels without an obvious cause may be exposed to moisture. While condensation and other issues can produce similar symptoms, recurring paint damage near plumbing can indicate a hidden leak.
Musty Odors
A persistent musty or damp smell can develop when moisture accumulates in enclosed areas. If the odor continues despite normal cleaning and ventilation, check for signs of water intrusion or a hidden plumbing leak.
Mold Growth
Unexpected mold or mildew growth, particularly around walls, ceilings, cabinets, or floors near plumbing, can indicate prolonged moisture. Finding and correcting the source of the moisture is important rather than simply cleaning the visible mold.
Warm or Wet Spots on Floors
An unusually warm or wet area on a floor can sometimes indicate a leaking hot-water pipe beneath the surface. Wet spots that appear without spills or other obvious causes should be investigated, particularly when they recur.
Sounds of Running Water
Hearing dripping, hissing, or the sound of running water when all faucets, toilets, and water-using appliances are turned off can be an important warning sign.
If these signs appear together, especially unexplained water usage combined with dampness or persistent sounds, a professional plumbing inspection may be necessary. Specialized leak-detection methods can help locate hidden leaks without unnecessarily opening large sections of walls or flooring.
FAQS:
How do I fix a leaking pipe at home?
Turn off the water supply first, dry the affected area, and identify the source of the leak. Minor leaks may be temporarily repaired with suitable repair products, while damaged pipe sections may need replacement.
Can I temporarily stop a leaking pipe?
Yes, pipe repair tape, clamps, or compatible epoxy products may temporarily control a small leak. However, severely damaged or corroded pipes usually require a permanent repair.
How do I fix a leaking pipe joint?
First, shut off the water and inspect the joint. If the connection is loose, carefully tighten it without overtightening. A damaged fitting, washer, or seal may need to be replaced if the leak continues.
Can a leaking pipe cause water damage?
Yes. A leaking pipe can damage walls, ceilings, floors, cabinets, and other materials. Long-term moisture may also encourage mold and mildew growth.
When should I call a plumber for a leaking pipe?
Call a professional for burst pipes, hidden leaks, severe corrosion, major water damage, recurring leaks, or problems involving main water or sewer lines.
Conclusion
Knowing how to fix a leaking pipe can help you handle minor plumbing issues before they become costly problems. Start by shutting off the water, identifying the source, and choosing the appropriate repair method. Temporary solutions can control small leaks, but damaged, burst, hidden, or severely corroded pipes often require permanent professional repairs. Regular inspections and quick action can help prevent water damage and protect your plumbing system.